


A clean filter does not always mean a clean heat pump. I learned that the hard way after months of routine checks still left hidden dust inside the system.
If you are handling heat pump cleaning yourself, the real challenge is knowing what you can safely reach and what should be left to a technician.
Filters, covers, vents, and outdoor debris are manageable with the right steps. Coils, blower wheels, drains, and electrical sections need more caution.
This guide explains the cleaning schedule, tools, DIY methods, common mistakes, warning signs, and professional limits so you can maintain airflow, reduce strain, and avoid damaging expensive parts.
What Heat Pump Cleaning Actually Covers
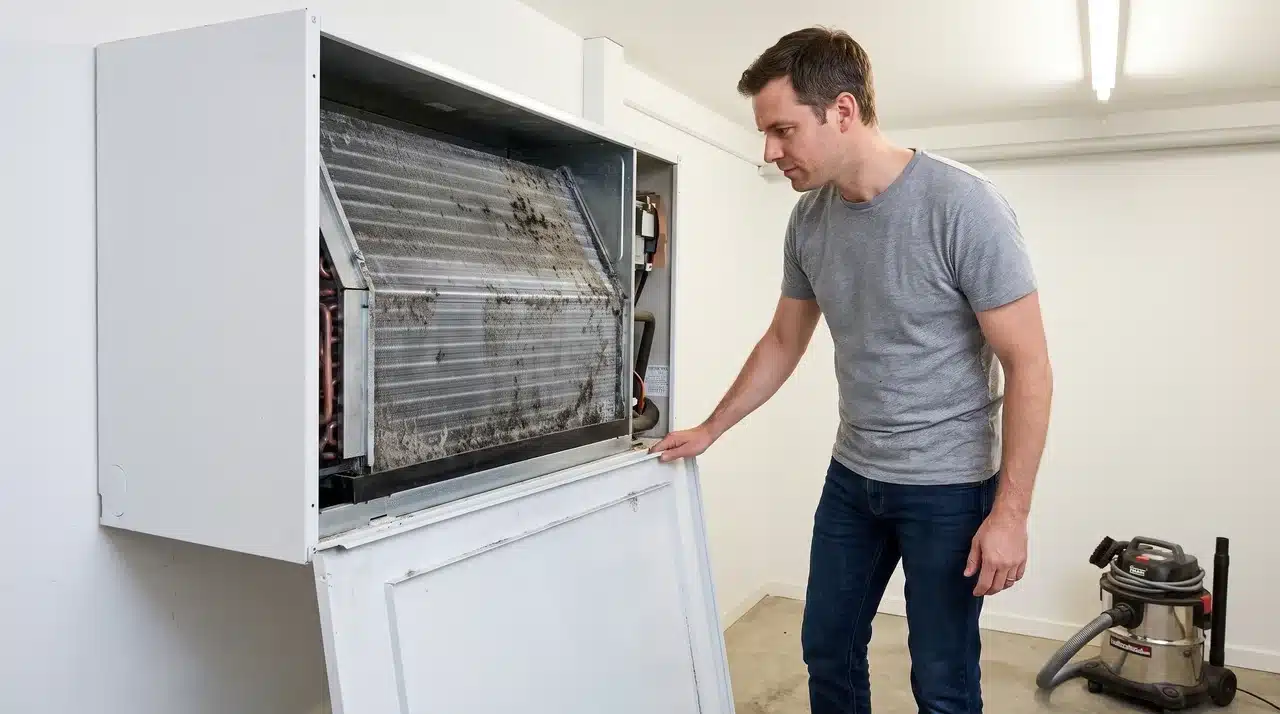
A complete cleaning routine covers four main components: indoor filters, the evaporator coil, the blower wheel, and the outdoor condenser coil. Each part affects the system differently when dust, grease, leaves, or biological buildup accumulates.
The filter is the easiest component to maintain, but it is not the only part that influences airflow. Dust that passes through or around the filter can settle on the indoor coil and blower wheel. Outdoor debris can also restrict the coil that releases or absorbs heat during operation.
Understanding each component makes it easier to follow the right cleaning schedule.
| Component | Where it sits | What happens when it gets dirty |
|---|---|---|
| Indoor filters | Inside the wall unit, return grille, or air handler | Airflow decreases, making the system work longer |
| Evaporator coil | Behind the filter inside the indoor unit | Heat transfer falls, and the coil may freeze |
| Blower wheel | Inside the indoor air handler or mini-split head | Airflow weakens even when the filter looks clean |
| Outdoor condenser coil | Around or inside the outdoor cabinet | Heating and cooling performance can decline |
The filter usually needs the most frequent attention. Indoor coils, blower wheels, drain pans, and deeply clogged outdoor coils often require professional cleaning because accessing them involves internal panels, electrical parts, or delicate fins.
Heat Pump Cleaning Schedule
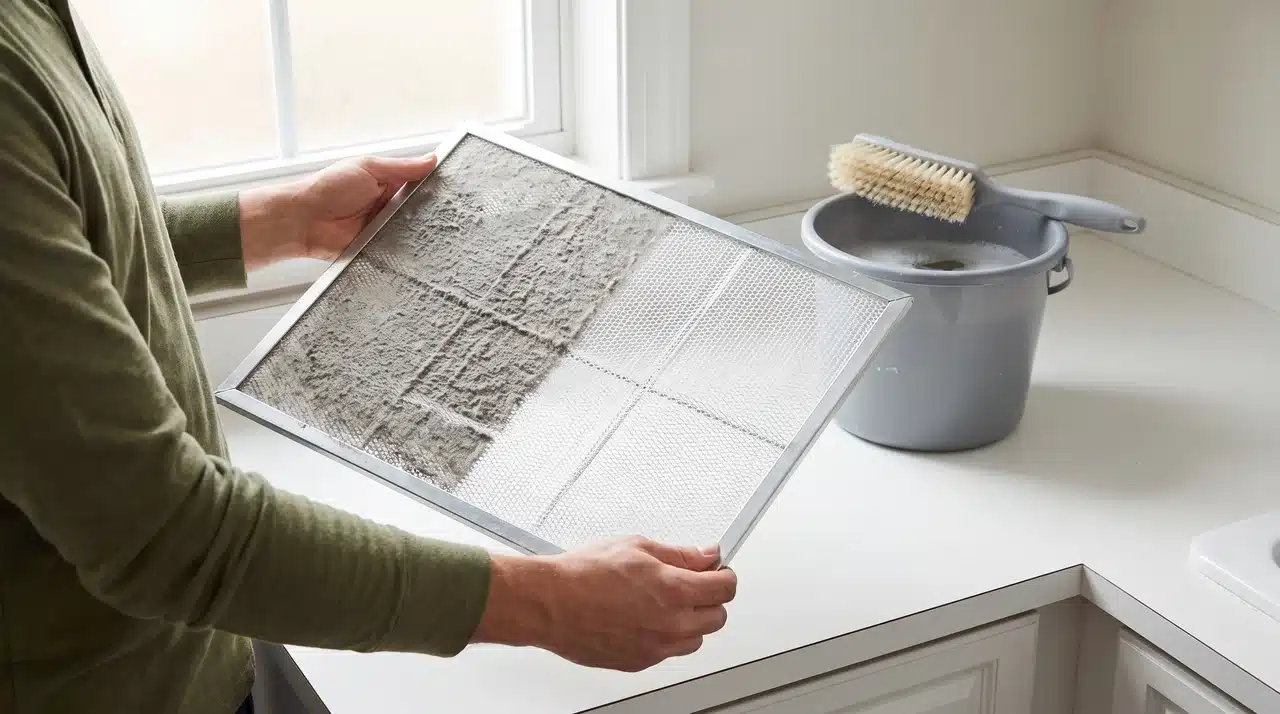
Cleaning frequency is an important part of ongoing heat pump care because filters, coils, drains, and outdoor components collect dirt at different rates.
Use the following schedule as a general starting point.
| Cleaning task | Suggested frequency | Main warning signs |
|---|---|---|
| Check indoor filters | Every month | Grey surface, weak airflow, visible dust |
| Clean washable filters | Every 1–2 months | Dust, grease, or filter reminder |
| Replace disposable filters | Every 1–3 months | Dark color, clogging, damage, or odor |
| Wipe indoor covers and vents | Every 1–2 months | Dust around grilles or louvers |
| Clear the outdoor unit | Monthly | Leaves, grass, weeds, snow, or rubbish |
| Inspect the condensate outlet | Every 1–3 months | Slow drainage, algae, water, or odor |
| Inspect indoor and outdoor coils | At least annually | Matted dirt, freezing, or poor performance |
| Schedule professional servicing | Once or twice yearly | Internal buildup, drainage issues, or declining output |
A system in a home with pets or heavy dust may need filter cleaning more frequently. A lightly used unit in a cleaner environment may remain clear for longer.
Do not wait for the system to stop working. Cleaning is easier when buildup is light and has not spread to internal components.
Tools and Safety Before Cleaning
Most homeowner cleaning tasks require only simple tools. Strong chemicals and high-pressure equipment are unnecessary and can damage the unit.
Prepare the following:
- Vacuum with a soft brush attachment
- Microfiber cloths
- Mild dish soap
- Soft-bristle brush
- Garden gloves
- Low-pressure garden hose
- Towels or a waterproof sheet
- Correct replacement filter, when needed
- Stable step stool for a wall-mounted mini-split
Before opening an indoor unit or touching the outdoor cabinet, turn the system off at the thermostat or remote. Switch off the appropriate breaker or disconnect and wait until every fan has stopped.
How to Clean Indoor Heat Pump Filters
Cleaning the indoor filter is the safest and most important DIY task. Follow these steps carefully to maintain airflow and prevent dust from reaching internal components.
- Step 1: Disconnect the power: Turn off the heat pump at the thermostat or remote, then switch off the correct breaker before opening the filter compartment.
- Step 2: Locate the filter: Check the return-air grille, air handler, filter cabinet, or front panel of the mini-split. Note its original position and airflow direction.
- Step 3: Inspect its condition: Hold the filter toward a light. Clean or replace it when it looks grey, clogged, damaged, greasy, damp, or unusually dark.
- Step 4: Vacuum light dust: Use a vacuum with a soft brush attachment to remove loose surface dust without pressing hard enough to damage the filter material.
- Step 5: Wash reusable filters: Rinse washable filters with lukewarm water and mild dish soap when permitted. Never wash disposable pleated paper or fiber filters.
- Step 6: Let the filter dry: Place the washed filter in a shaded, ventilated area. Avoid direct sunlight, heaters, hair dryers, and other high-temperature drying methods.
- Step 7: Reinstall the filter: Return the completely dry filter to its original position, following the airflow arrow or securing it properly inside the mini-split tracks.
After restarting the system, check for steady airflow and unusual noises. Continued weakness may indicate buildup on the evaporator coil or blower wheel.
How to Clean a Mini-Split Indoor Unit
A mini-split allows access to its filters, cover, intake grille, and louvers. Internal coils and blower components should only be inspected, not dismantled.
- Step 1: Protect the surrounding area: Place towels or a waterproof sheet beneath the wall-mounted unit to catch loose dust and protect the floor and wall.
- Step 2: Disconnect electrical power: Turn off the mini-split with its remote, then isolate power at the breaker. Wait until the louvers and fan stop completely.
- Step 3: Open the front cover: Lift the cover using the designated tabs shown in the manual. Do not force its hinges or clips beyond their stopping point.
- Step 4: Remove the mesh filters: Slide the filters carefully from their tracks. Note their positions so they can be installed correctly after cleaning.
- Step 5: Clean the filters: Vacuum loose dirt or wash reusable filters with lukewarm water and mild soap. Follow separate instructions for secondary air-purifying filters.
- Step 6: Wipe accessible surfaces: Clean the front cover, intake grille, and plastic surfaces with a slightly damp microfiber cloth rather than spraying cleaner into the unit.
- Step 7: Clean the louvers gently: Support the louvers while wiping them. Do not twist or force them because they may connect to small motors and gears.
- Step 8: Inspect the indoor coil: Look behind the filters for matted dust, grease, biological growth, water marks, or ice. Avoid touching or spraying the coil.
- Step 9: Check the blower wheel: Use a flashlight to inspect the cylindrical fan through the outlet. Thick dust or black particles indicate professional cleaning is needed.
- Step 10: Reassemble and test: Reinstall completely dry filters, close the cover securely, restore power, and confirm that airflow and louver movement are normal.
Stop cleaning when internal buildup requires panel removal or direct coil access. Professional servicing is safer when smells, leaks, black particles, or weak airflow continue.
How to Clean the Outdoor Heat Pump Unit
Outdoor pump cleaning focuses on maintaining open airflow and removing loose debris. Avoid opening service panels or disturbing electrical and refrigerant components.
- Step 1: Disconnect the power: Turn off the heat pump and isolate electricity at the breaker or outdoor disconnect before approaching the fan, grille, or coil.
- Step 2: Clear surrounding debris: Remove leaves, grass, weeds, mulch, branches, and rubbish. Maintain approximately 24 inches of open space where the manufacturer allows it.
- Step 3: Clean the cabinet top: Brush leaves and loose debris from the top grille without removing it or inserting fingers and tools through its openings.
- Step 4: Wipe exterior surfaces: Use a soft brush and damp microfiber cloth to clean the cabinet and grille without scraping the delicate aluminum coil fins.
- Step 5: Rinse the accessible coil: When the manual permits it, use a garden hose at low pressure. Direct water straight toward the coil rather than sideways.
- Step 6: Avoid pressure washing: Never use concentrated water pressure because it can flatten fins, remove protective coatings, and force moisture into electrical compartments.
- Step 7: Inspect the coil fins: Check visible fins for crushing or bending. Do not straighten extensive damage with screwdrivers, knives, or unsuitable household tools.
- Step 8: Check winter buildup: Remove loose snow from around the cabinet. Do not chip ice from the coil or pour hot water over frozen components.
- Step 9: Restore power and test: Allow wet surfaces to dry, restore electricity, and listen for buzzing, scraping, rattling, vibration, or irregular outdoor fan movement.
Book professional service when the coil remains clogged, fins are badly damaged, ice repeatedly forms, or unusual sounds continue after accessible areas are cleaned.
What Only a Professional Should Clean
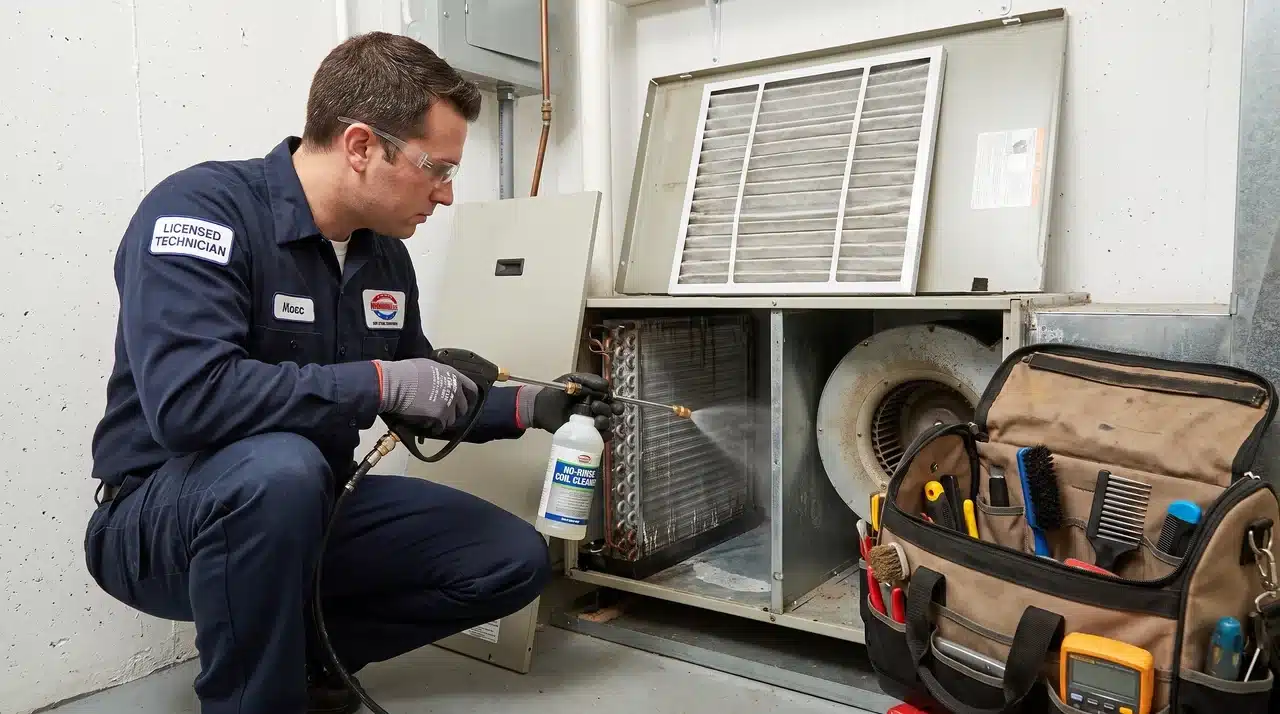
Internal heat pump components should be cleaned by a trained technician because reaching them often requires partial disassembly.
The evaporator coil can collect dust, grease, and biological buildup between its delicate fins, while the blower wheel may become coated with debris that reduces airflow and causes vibration.
Condensate pans, secondary drains, traps, and pumps can also develop hidden blockages that are difficult to reach safely.
A technician can open the unit, protect electrical parts, use compatible HVAC cleaners, manage wastewater, and reassemble each component correctly.
Homeowners should arrange professional cleaning when coils appear heavily matted, airflow remains weak, black particles leave the vents, musty smells continue, water leaks indoors, or drains repeatedly clog.
Avoid using household cleaners, bleach, acids, or long brushes inside the unit.
Common Heat Pump Cleaning Mistakes
Incorrect cleaning methods can reduce airflow, damage delicate components, or create electrical risks. Review these common mistakes before cleaning any indoor or outdoor heat pump part.
| Cleaning mistake | Why it causes problems |
|---|---|
| Cleaning with the power connected | Fans may start automatically, while electrical components can remain live and create a serious safety risk. |
| Using a pressure washer | Concentrated water can flatten delicate coil fins and force moisture into motors, wiring, and electrical compartments. |
| Washing disposable filters | Pleated paper and fiber filters may collapse, lose their shape, and restrict airflow after becoming wet. |
| Reinstalling damp filters | Remaining moisture attracts dust, encourages unwanted odors, and may increase biological buildup inside the unit. |
| Spraying household cleaner into a mini-split | Liquid or chemical residue may reach the control board, blower motor, sensors, wiring, wall, or drain pan. |
| Scrubbing coil fins | Aluminum fins bend easily, and damaged sections can restrict airflow and reduce effective heat transfer. |
| Opening sealed service panels | Internal panels may expose electrical connections, moving components, refrigerant tubing, and parts not designed for homeowner access. |
| Using sharp tools on ice | Chipping or scraping ice can bend fins, puncture refrigerant tubing, or damage the coil surface. |
| Ignoring the manufacturer’s manual | Filter types, approved products, panel-removal instructions, clearance requirements, and cleaning methods vary between heat pump models. |
| Assuming filter cleaning solves everything | Weak airflow may continue when dust has accumulated on the evaporator coil, blower wheel, vents, or internal air passages. |
Stop immediately when cleaning requires dismantling internal parts, handling refrigerant, touching electrical components, removing motors, or accessing equipment installed in an unsafe location.
Signs Professional Cleaning Is Needed
Professional cleaning is worth considering when routine filter and outdoor maintenance do not restore normal performance.
Contact an HVAC technician when:
- Airflow remains weak after cleaning the filter
- The system runs longer than usual
- Indoor coils freeze repeatedly
- Black particles come from a mini-split
- Musty smells return shortly after cleaning
- Water leaks from the indoor unit
- The condensate drain repeatedly blocks
- The blower makes scraping or vibrating noises
- Thick dirt is visible on the indoor coil
- Outdoor coil buildup cannot be removed safely
- The system struggles to maintain the selected temperature
- The breaker trips or electrical smells appear
- Refrigerant lines show oily residue
- Internal cleaning requires panel or motor removal
A professional service may include deep coil cleaning, blower wheel removal, drain-pan cleaning, condensate flushing, electrical inspection, refrigerant checks, and operational testing.
Professional Heat Pump Cleaning Costs
Professional costs vary by system design, access, number of indoor units, local labor rates, and the amount of contamination.
The figures below provide broad planning estimates rather than fixed quotations.
| Service type | Typical cost range | What may be included |
|---|---|---|
| Basic outdoor coil cleaning | $75–$200 | Debris clearing, gentle coil cleaning, and clearance check |
| Single-zone indoor cleaning | $100–$250 | Filter service, indoor coil inspection, and drain check |
| Full-system deep cleaning | $219–$520 | Coils, blower wheel, condensate system, and operational inspection |
| Annual maintenance plan | $150–$350 | One or two visits, inspections, and minor adjustments |
| Compressor replacement | $800–$1,700 | Compressor replacement after a major system failure |
Standard HVAC labor may range from approximately $75 to $150 per hour, while a deep cleaning can take one to three hours depending on the equipment and access.
Multi-zone mini-splits normally cost more because every indoor head must be opened, inspected, and cleaned separately.
Confirm local prices before booking because quotations may exclude replacement parts, refrigerant repairs, severe contamination, difficult access, or additional indoor units.
Routine Upkeep Between Deep Cleanings
Small maintenance habits reduce how quickly dirt reaches the internal coil and blower wheel.
Keep furniture, curtains, boxes, and decorations away from return grilles and mini-split air intakes. Vacuum the room regularly so less dust enters the system.
Outside, keep grass, weeds, leaves, mulch, and dryer lint away from the cabinet. Check the unit after storms, mowing, landscaping, construction work, and heavy snowfall.
Record filter-cleaning and replacement dates on a phone calendar. This makes it easier to determine whether the filter becomes dirty every month or can safely remain in place for longer.
Schedule professional maintenance at least annually. Systems used heavily throughout the year may benefit from an inspection before both the main cooling and heating seasons.
Final Thoughts
Keeping a heat pump clean is less about doing everything yourself and more about knowing where to stop.
You can safely clean filters, wipe accessible surfaces, clear outdoor debris, and check for obvious airflow or drainage problems. Internal coils, blower wheels, electrical parts, and hidden drain sections need professional care.
A regular heat pump cleaning routine helps the system move air properly, transfer heat efficiently, and avoid unnecessary strain during every season.
It also makes unusual smells, leaks, ice, noise, and weak airflow easier to spot before they become larger problems.
Check your filter and outdoor unit this week, follow the manufacturer’s instructions, and share these maintenance tips with another homeowner.
Frequently Asked Questions
Can you clean a heat pump yourself?
Homeowners can safely clean indoor filters every 1 to 2 months and clear debris around the outdoor unit. Deep cleaning the evaporator coil, servicing the blower wheel, and full condensate drain work require a licensed technician. Attempting those tasks without the right access and specialist cleaners risks damaging components that are expensive to repair or replace.
How long does a professional heat pump deep clean take?
A single indoor unit clean typically takes one to two hours. Multi-zone ductless systems with several indoor heads take longer because each unit requires individual attention. A full ducted system service, including coil cleaning, blower wheel work, and condensate drain servicing, can take two to three hours, depending on the system configuration and access conditions.
What cleaning solution is safe to use on heat pump coils?
For outdoor coil rinsing, plain water from a garden hose at low pressure is sufficient and safe. Indoor evaporator coils require no-rinse specialist HVAC coil cleaners applied during professional servicing. Standard household cleaners, vinegar solutions, and pressure washers are not appropriate for coil surfaces and can cause corrosion or permanent fin damage over time.