

Solar battery installation looks straightforward on paper until you’re three weeks into waiting on utility approval and your panels still aren’t connected to anything.
The sequence matters more than most people expect, and home solar battery installation has more moving parts than a simple equipment swap.
Skipping ahead or missing a single approval can set the entire project back, and the step that causes it is rarely the one anyone warned you about.
What follows breaks down every stage clearly, where things typically go wrong, and exactly what to confirm before your installer drives away.
What Triggers a Solar Battery Installation?
A home solar battery setup installation follows one of two paths depending on whether you’re pairing storage with a new system or retrofitting an existing one, and that path determines your inverter setup.
If you’re starting fresh with new panels, your installer designs the entire system around battery storage from day one, meaning the right inverter gets chosen upfront without any rework needed later.
If you already have solar panels, you’re on the retrofit path, which is where most homeowners land. It’s more involved because your existing inverter may or may not support a battery system.
Professional battery storage installation isn’t just a suggestion here. You’re dealing with high-voltage components and local code compliance, and those realities are exactly why this process follows the structured stages it does.
If you haven’t decided which type of battery system fits your home yet, start by comparing solar battery backup systems before planning the installation.
What Does the Installation Process Actually Involve?
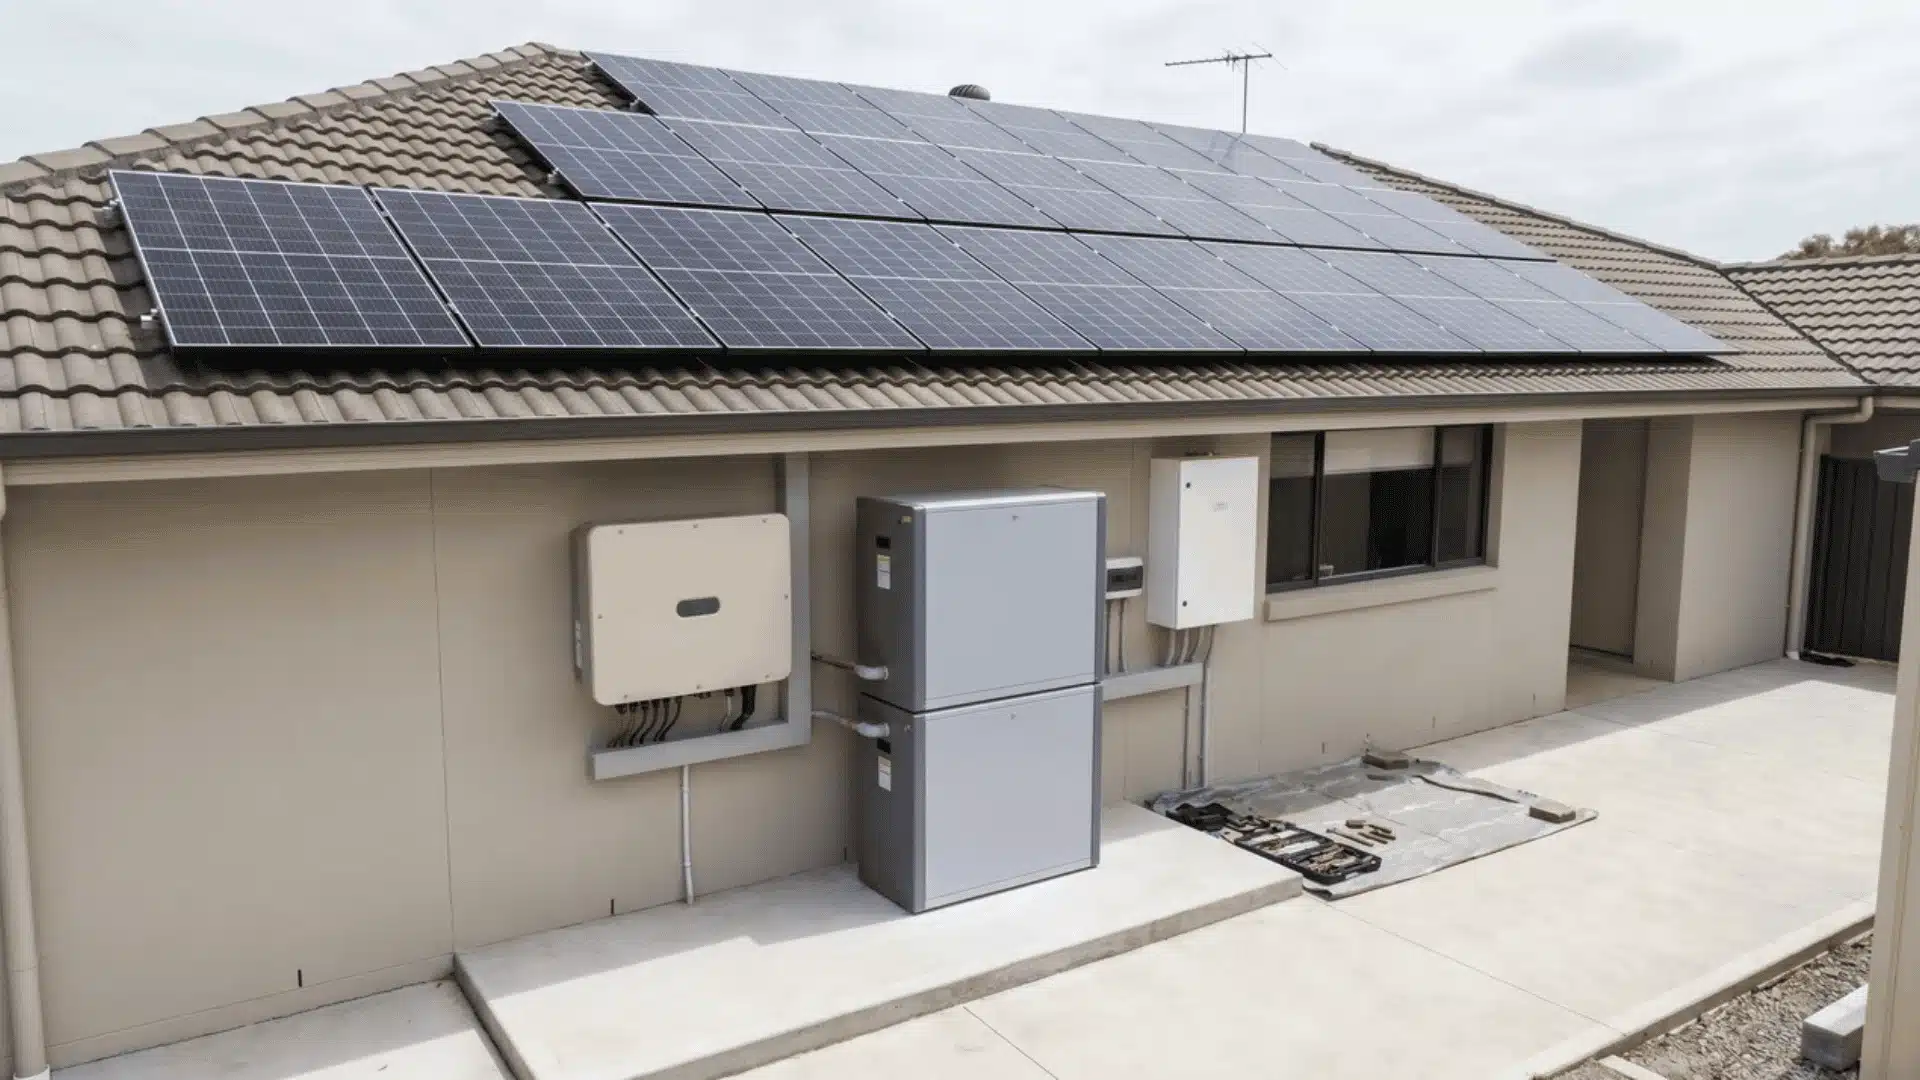
Installing a home solar battery involves five sequential stages: site assessment, permitting, mounting, wiring, and commissioning and each stage must be completed before the next can begin.
Each stage depends on the one before it. Skipping ahead or rushing a step doesn’t save time; it typically creates rework, failed inspections, or a system that runs incorrectly from day one.
1. Site Assessment and Sizing
Your installer visits your home to evaluate where the battery will live and how large it needs to be. Those two answers drive every equipment decision that follows.
- Your daily energy consumption determines whether you need whole-home backup or coverage for essential circuits only
- The physical location must be cool, dry, and ventilated, typically a garage or utility room
- Sizing to peak demand, not just average use, prevents the most common post-installation complaints
Getting your assessment right means you won’t be adding a second battery six months later because the first one runs out by midnight.
2. Permits and Utility Approval
Most homeowners expect one permit. There are actually two separate approvals, and conflating them is where your project timeline quietly falls apart.
- A municipal building permit covers the physical installation and is filed with your local authority
- Utility approval is a separate gate that controls whether your battery can interact with the grid at all
- Utility sign-off is not automatic and processing times vary by provider, often adding weeks independently of your building permit
Treating these as one step is the single most common reason homeowners are surprised by how long the process takes.
3. Mounting the Battery Unit
Once permits are approved, your physical installation begins. Battery units are typically wall-mounted or floor-stacked in the pre-assessed location your installer identified.
- Units require minimum clearance of around three feet from other equipment or surfaces
- The location must stay within the temperature range specified by your manufacturer
- Multiple battery units need additional spacing considerations planned during your assessment stage
Where your battery lives matters more than most people realise, and a poor location decision at this stage affects both safety and long-term performance.
4. Wiring and Electrical Integration
This is the most technically involved stage and the point where your AC-coupled or DC-coupled configuration becomes a physical reality inside your home’s electrical system.
- The battery connects to the inverter, which connects to your main electrical panel
- A proper grounding system is installed as a non-negotiable safety requirement
- Whether you have a hybrid inverter or a separate battery inverter determines the exact wiring path your electrician follows
This stage is why professional installation matters most. The decisions made here affect how safely and efficiently your entire system operates going forward.
5. Commissioning and System Setup
Physical installation being complete does not mean your system is working correctly. Commissioning is where it actually gets configured to do what you expect it to do.
- Inverter settings are programmed to match your energy goals and utility export rules
- Charge and discharge schedules are set based on your usage patterns and time-of-use rates
- Your monitoring app is connected and tested to confirm all three data streams are live
People usually skip reviewing these settings with their installer, and that one oversight is usually why the system underperforms in the first few months.
Getting these five stages right, in order, is what separates a system that performs as promised from one that quietly runs on default settings nobody ever intended.
AC-Coupled vs. DC-Coupled: Which Wiring Setup Do You Have?
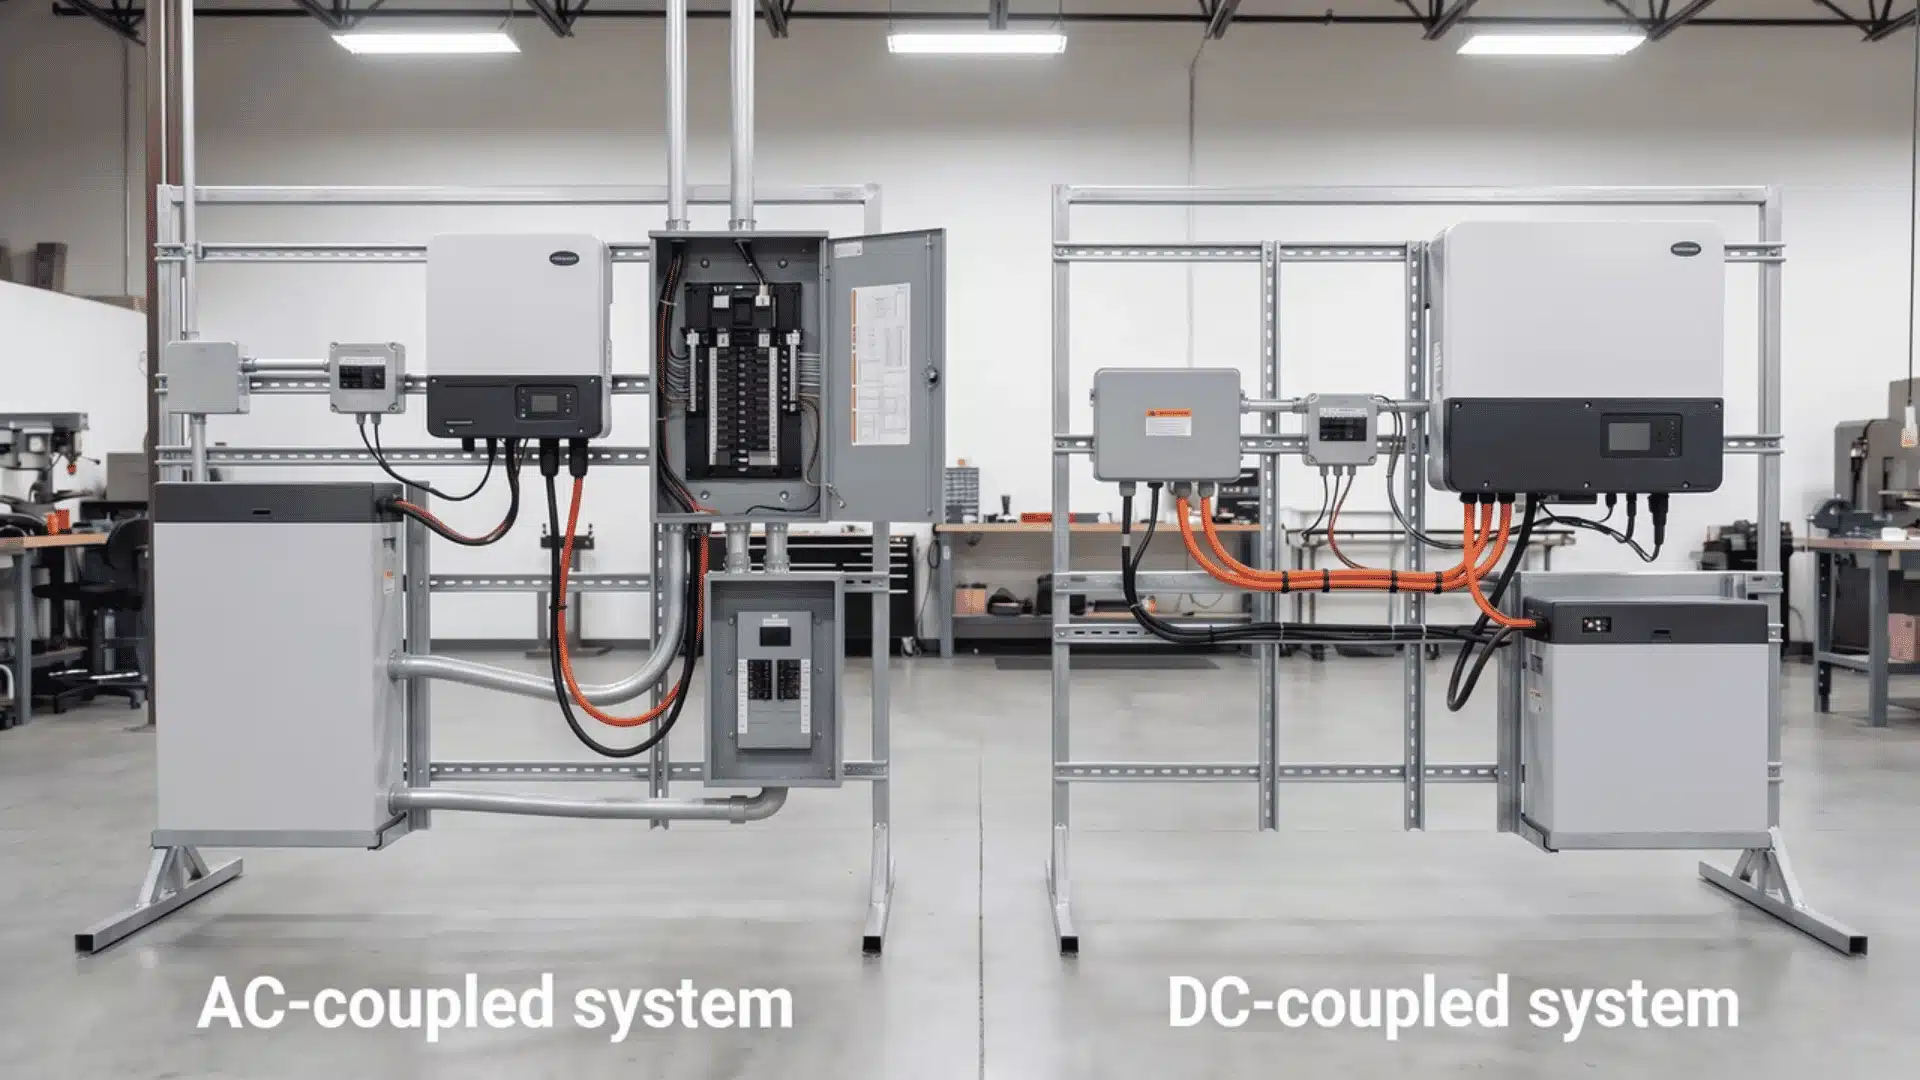
Whether your battery system is AC-coupled or DC-coupled is largely determined by your existing inverter’s compatibility, not by which option you prefer.
This distinction feels like a choice you make upfront but your current equipment makes most of that decision before you even call an installer.
| Factor | AC-Coupled | DC-Coupled |
|---|---|---|
| Existing inverter | Stays in place | Replaced with hybrid model |
| Battery connection point | AC electrical panel | Shared inverter with solar panels |
| Retrofit complexity | Lower | Higher |
| Efficiency | Slightly lower | Higher |
| Upfront cost | More affordable | Higher investment |
During your site assessment, your installer checks whether your current inverter supports a battery communication protocol. That single check determines which setup you are on.
Most retrofit homeowners land on the AC-coupled path because it avoids replacing an inverter that is otherwise working perfectly fine.
Where Does a Solar Battery Installation Break Down?
Solar battery installations don’t usually fail because of bad equipment. They break down at three predictable points that are easy to miss if you don’t know to look for them.
- Utility approval delays: These sit entirely outside your installer’s control. Some utilities take several weeks to approve interconnection, regardless of how quickly permits are submitted, and that window stalls everything else.
- Undersized battery capacity: This is the most common post-installation complaint. It happens when sizing is based on average daily use rather than peak demand or how long you actually need backup power to last.
- Commissioning misconfiguration: The system runs, but not the way you intended. Charge schedules and grid export settings get left on defaults that no one reviewed before the installer left.
All three are predictable, which means all three are avoidable. The right questions asked early enough keep each one off your timeline and off your energy bill.
How Do You Verify the System Is Working Correctly?
A solar battery system is correctly installed when the monitoring app shows the battery charging from solar, discharging on schedule, and reporting all three data streams. Run these checks before your installer leaves:
- Battery is charging from solar, not the grid
- Battery is discharging at your programmed times
- Monitoring app shows all three live data streams
- Written documentation of every programmed setting is in your hands
Defaulting to grid charging instead of solar is one of the two most common commissioning errors, and it goes undetected because the system still appears to be working. The same applies to discharge timing. A battery sitting idle when it should be powering your home is a configuration problem, not a hardware fault.
Your monitoring app should show solar input, grid import/export, and real-time state of charge simultaneously. If any stream is missing, the system isn’t reporting correctly.
The written settings record matters more than most homeowners realise. Without it, any future service call or system expansion starts from scratch.
These four checks take less than ten minutes and are the difference between a system that works as promised and one that quietly runs on the wrong settings from day one.
Conclusion
Solar battery installation is a sequenced process where each stage directly affects the next, and understanding that changes how you approach it from the start.
The real difference between a system that performs and one that quietly underdelivers comes down to sizing, approvals, and commissioning settings most homeowners never think to review.
At this point, you have a clear picture of what the process involves, where delays typically occur, and what to verify before your installer drives away.
Ready to move forward? Get quotes from certified installers in your area and walk into that first conversation knowing exactly the right questions to ask.
Frequently Asked Questions
Can I add a battery to an existing solar system without replacing my inverter?
Yes, in most cases. An AC-coupled setup connects the battery to your home’s AC panel independently of the existing inverter, leaving it in place. DC-coupled setups require inverter replacement but are more efficient. Your installer will determine which applies based on your current equipment during the site assessment.
Do I need a permit to install a home solar battery?
Yes. Most jurisdictions require both a municipal building permit and separate utility approval before a grid-connected battery can be installed. Permit requirements vary by location, but skipping either step can result in the system being disconnected or failing a home inspection. Your installer typically handles the filing.
How long does a solar battery installation take?
Physical installation typically takes one to two days. Total project timeline including permitting and utility approval, commonly runs four to twelve weeks depending on local permit processing times and utility backlog. The hardware installation itself is rarely the bottleneck.
How much battery capacity do I actually need?
Capacity depends on your goal. Covering essential circuits (refrigerator, lights, router) during an outage typically requires 5–10 kWh. Whole-home backup for 24 hours or more requires significantly more. An installer will size the system based on your average daily usage and which loads you want covered.